The Revival of Old Floors: A Complete Guide to Hardwood Floor Sanding and Refinishing
An old wooden floor is not a sentence—it's a promise. Hidden beneath every worn plank and every layer of old varnish or paint is the unique texture and warmth of natural wood. Restoring a floor through professional sanding and applying a new protective finish is the most effective way not just to update an interior, but also to significantly increase your home’s value.
RESTORATIONWOODFLOORINTERNAL REPAIRSOUR WORKSPAINTING & STAINING
10/10/20253 min read
In this article, we will detail the process of updating old hardwood floors, from meticulous preparation to the final, radiant finish.
Part 1: Assessment and Preparation—The Foundation of Success
Before beginning any work, a thorough assessment of the floor's condition is essential.
1.1. Diagnosis and Subfloor Repair
First, check every board for squeaks or looseness. Any loose elements must be securely screwed down to the subfloor. This step is critical, as unsecured planks can cause poor sanding results and premature wear of the new finish.
Next, eliminate all metal obstacles. Any protruding nails or staples must be recessed into the wood by 3-5 mm using a nail punch. Hitting metal with a sanding machine can seriously damage both the equipment and the floor. Large gouges and sections requiring board replacement should be addressed before the main sanding begins.
1.2. Room Preparation
The room must be completely cleared of furniture. Removing baseboards allows us to treat the wood right up to the wall edges, ensuring a uniform result. To prevent the spread of construction dust, which is unavoidable, be sure to seal doorways with heavy plastic sheeting or cloth. We also recommend temporarily disconnecting power to wall outlets near the floor.
Part 2: Sanding—Stripping and Leveling
Sanding is the core of the restoration process. It removes the old finish, deep scratches, and stains, and most importantly, levels the surface to a perfect, smooth state.
2.1. Coarse (Rough) Sanding
The goal of this stage is to remove the old finish (varnish, paint, or oil) and eliminate significant height differences between boards. A powerful drum or belt sanding machine is used for this. We start with a coarse grit sandpaper (P24 or P40). Sanding is typically performed at a 30-45 degree angle to the wood grain, which is most effective for removing unevenness.
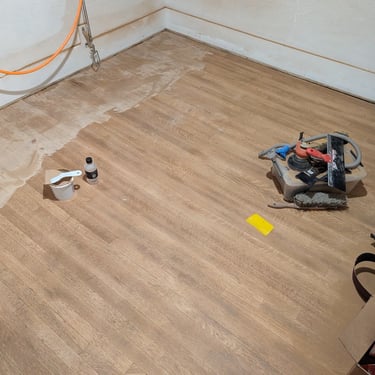
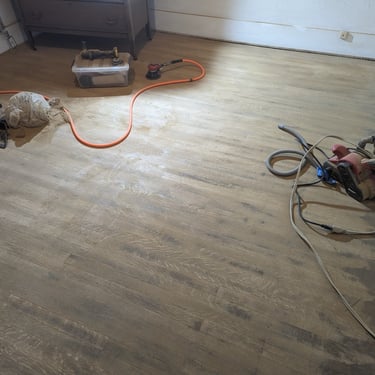
In the images where the floor looks lighter and unfinished, you can see that the old coating has been stripped away, exposing the "fresh" wood.
2.2. Edge and Corner Treatment
Since a large drum machine cannot reach the very edges of the room, a specialized edging sanding machine is used to treat corners and the perimeter. Any spots that the edging tool cannot reach are finished manually.
2.3. Filling Gaps and Imperfections
After the coarse sanding, all minor gaps, cracks, and defects become visible. For this, we use a special wood filler. We mix this filler with fine wood dust collected from your floor during sanding. This method ensures an ideal color matchbetween the filler and the main floor. The filler is applied with a rubber or metal trowel across the entire area, forcing the compound into the gaps.
2.4. Fine and Finish Sanding
The objective of the final stage is to remove traces left by the coarse abrasive, level the filler, and prepare the surface for the protective finish. A multi-disc (trio) sanding machine is used, which provides an ideally smooth, scratch-free surface. We gradually move to finer grits: P60, P80, and P100 (or P120). Remember: the quality of the final sanding directly impacts the look and durability of the coating.
Part 3: Applying the Finish—Protection and Aesthetics
Once the floor is perfectly sanded and thoroughly vacuumed, the most rewarding and visually effective stage begins—applying the finish.
3.1. Choosing the Coating
The choice of finish (varnish/lacquer, oil, or wax) determines the floor's appearance, durability, and maintenance requirements:
Varnish/Lacquer (Polyurethane, Water-based): Creates a strong protective film on the surface, offering high wear resistance. Available in gloss, semi-gloss, or matte.
Oil (Natural or Hard Wax Oil): Penetrates deep into the wood, enhancing its natural texture. Provides a matte, natural look that requires periodic maintenance.
3.2. Application Process
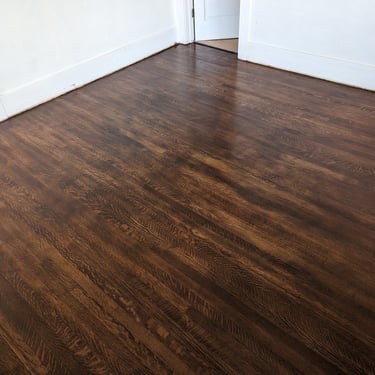
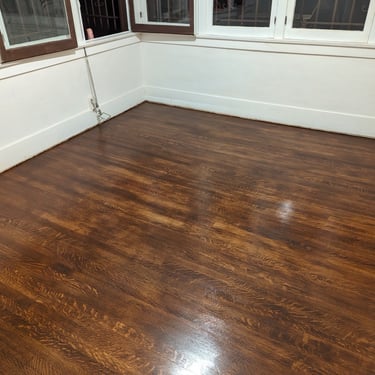
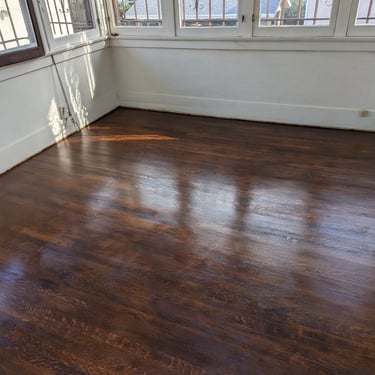
First Coat (Sealer/Stain): The first coat is applied. If you choose to stain the wood, as seen in the final photographs with the rich, dark color, the staining compound is applied at this stage. This coat seals the wood and often causes the grain to raise slightly.
Intermediate (Between-Coat) Sanding: After the first coat has completely dried, a light sanding is performed with a fine abrasive (P180-P240). This is essential for removing the raised wood grain and ensuring perfect smoothness and adhesion for the next layer.
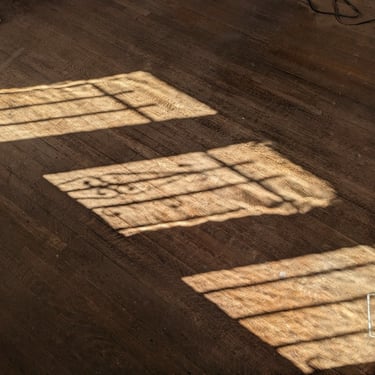
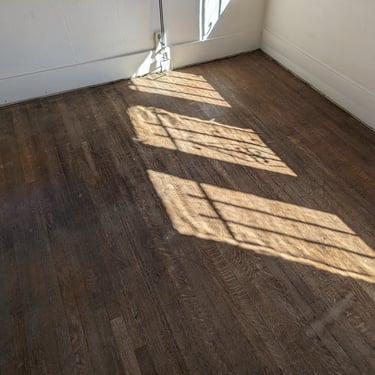
Final Coats: 2-3 final coats of the chosen finish are applied according to the manufacturer's instructions. In the images where the floor has a deep, rich brown color and a slight sheen, you can see how the coating beautifully accentuated the wood's structure and gave the floor a "rich," vintage look.
Professional Results with ProHands Handyman
Restoring an old floor is a meticulous process that requires professional equipment, strict adherence to technology, and experience.
We use only high-quality machinery and time-tested materials to guarantee:
An ideally flat surface free of waves and unevenness.
A durable finish resistant to wear and moisture.
Minimal dust thanks to modern dust collection systems.
Ready to see your old wooden floor shine with new life?
Contact us today to discuss your project and receive a personalized estimate. You can reach our company at (818) 401-7766.