Step-by-Step Guide to Drywall Ceiling Repair with Orange Peel Texture Application
Why Proper Ceiling Repair Matters
OUR WORKSINTERNAL REPAIRSDRYWALLRESTORATIONPAINTING & STAINING
1/3/20252 min read
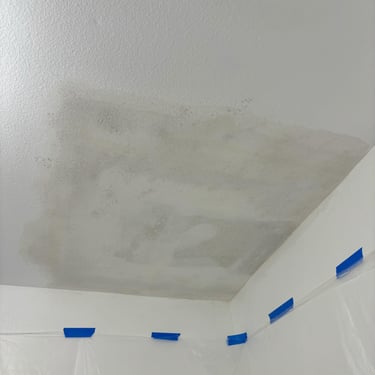
Ceiling damage is one of the most noticeable issues inside a home. Cracks, holes, water stains, or peeling texture immediately draw attention and can make an otherwise clean room look unfinished. A proper drywall ceiling repair — especially when an orange peel texture is involved — requires more than simply patching the surface. The goal is to restore a seamless, uniform finish that blends perfectly with the surrounding ceiling.
This step-by-step guide explains how drywall ceiling repairs are done correctly, from surface preparation to texture matching and final finishing.
⸻
Common Reasons for Drywall Ceiling Damage
Ceiling drywall can become damaged for several reasons, including:
• Water leaks from plumbing or roofing
• Hairline cracks caused by structural movement
• Old or failing joint compound
• Improper previous repairs
• Accidental impacts
Before applying texture or paint, the underlying issue must be addressed to prevent recurring damage.
⸻
What Is Orange Peel Ceiling Texture?
Orange peel texture is a lightly sprayed drywall finish that resembles the surface of an orange peel. It is commonly used on ceilings and walls because:
• It hides minor imperfections
• It provides a consistent, clean appearance
• It is easier to maintain than heavier textures
Matching an existing orange peel texture is one of the most challenging parts of ceiling repair and requires experience and precise application.
⸻
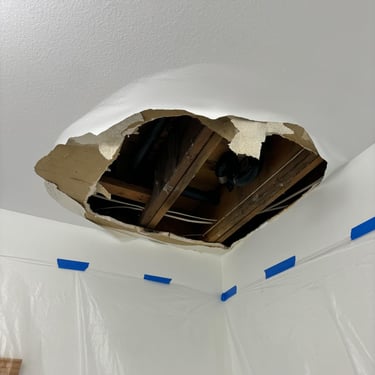
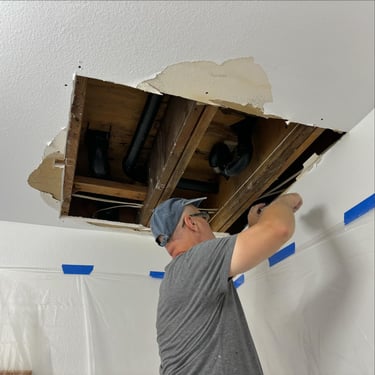
Step 1: Preparing the Damaged Area
Proper preparation is critical for a long-lasting repair.
This step includes:
• Removing loose or damaged drywall material
• Cutting clean edges around the damaged area
• Securing any loose drywall panels
• Cleaning the surface from dust and debris
Skipping this stage often leads to visible patches and premature failure.
⸻
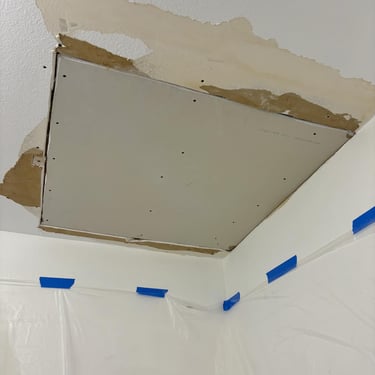
Step 2: Drywall Patching and Structural Repair
Depending on the size of the damage, the repair may involve:
• Installing a drywall patch
• Reinforcing the area with backing support
• Securing the patch flush with the ceiling surface
All fasteners are set properly, and seams are reinforced to prevent future cracking.
⸻
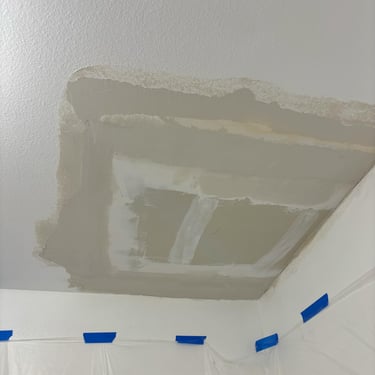
Step 3: Applying Joint Compound and Feathering
Joint compound is applied in multiple layers to:
• Cover seams and fasteners
• Smooth transitions between old and new drywall
• Create a flat, even surface
Each layer is allowed to dry and is sanded carefully. Feathering the edges ensures the repair disappears into the surrounding ceiling.
⸻
Step 4: Sanding and Surface Refinement
After the compound dries:
• The area is sanded smooth
• Edges are blended into the existing ceiling
• Any remaining imperfections are corrected
This step determines how invisible the final repair will be once painted.
⸻
Step 5: Orange Peel Texture Application
Applying orange peel texture requires experience and control.
Key factors include:
• Proper texture consistency
• Correct spray pressure and pattern
• Matching the size and density of the existing texture
The texture is applied gradually and evenly to avoid heavy buildup or visible transitions.
⸻
Step 6: Drying, Sealing, and Painting
Once the texture dries:
• The surface is sealed with primer
• Paint is applied to match the existing ceiling color
• Final blending ensures a uniform finish
When done correctly, the repaired area becomes indistinguishable from the original ceiling.
⸻
Why Texture Matching Is a Professional Task
Even small variations in texture thickness or spray pattern can make repairs stand out. Professional drywall ceiling repair focuses on:
• Texture consistency
• Seamless blending
• Proper lighting inspection
This attention to detail is what separates a professional repair from a visible patch.
⸻
Why Homeowners Choose ProHands Handyman
Homeowners rely on ProHands Handyman for drywall and ceiling repairs because we focus on:
• Clean, precise workmanship
• Accurate texture matching
• Proper repair sequencing
• Long-lasting, professional results
Every ceiling repair is treated as a finished surface, not a temporary fix.
⸻
Conclusion: A Seamless Ceiling Repair Makes All the Difference
Drywall ceiling repair with orange peel texture is a process that requires patience, precision, and experience. When each step is done correctly, the ceiling regains its original appearance, and the repair becomes completely invisible.
Whether the damage is caused by water, cracks, or previous repairs, proper restoration ensures a clean, finished interior that looks like new.
⸻
Need Professional Drywall Ceiling Repair?
ProHands Handyman
📞 Phone: 818-401-7766
📧 Email: info@prohandshandyman.com
Call or write to discuss your ceiling repair project and get professional guidance you can trust.