Renovation of a Kitchen Furniture Showroom in Los Angeles
ProHands Handyman Project – Full Interior Remodel (2025)
OUR WORKSINTERNAL REPAIRSLIGHTINGDRYWALLPAINTING & STAININGELECTRICALDOORS
4/21/20256 min read
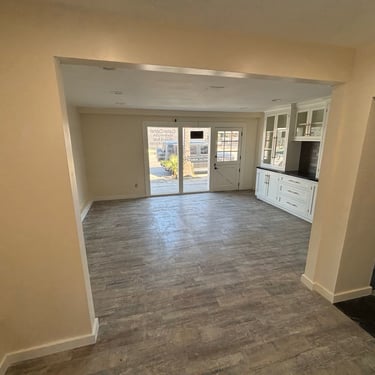
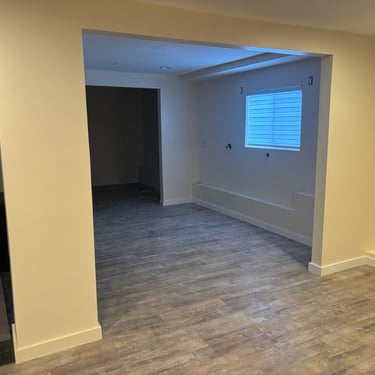
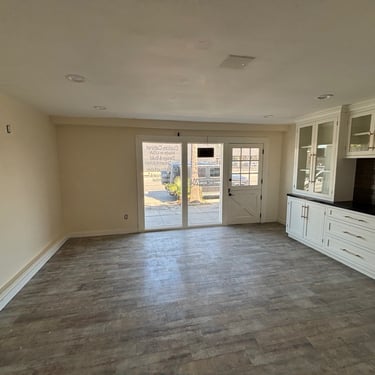
In 2025, our team at ProHands Handyman was invited to take on a complete renovation of a kitchen furniture showroom located in the heart of Los Angeles. The goal was to create a clean, modern, and functional space that would elevate the client’s product displays and give customers a warm and professional first impression.
Rather than starting from zero, this project focused on reshaping and upgrading the existing space — building new walls, creating custom openings, trimming with precision, and refining every surface. What began as an empty, uneven layout would soon become a polished environment ready to showcase premium kitchen interiors.
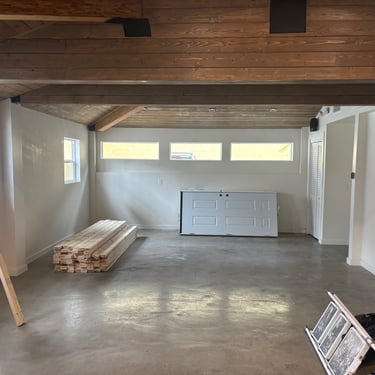
Phase 1: Rough Space and First Construction Steps
The first photos capture the space in its raw state — construction underway, tools on the floor, framing partially complete. At this stage, we were focused on building out the structure that would support the new showroom design:
📸 Photo Highlights:
New partition walls being framed and installed
Door openings cut and structured into the layout
Wall sections prepped for drywall and future finishes
Baseboards and trim already measured and staged for installation
Work zone organized for continuous, safe workflow during business hours
These early construction elements were critical. They helped establish the zones that would later house kitchen vignettes, customer consultation areas, and lighting display features.
Phase 2: Framing, Electrical Rework & Molding Installation
In the next stage of the renovation, we focused on structural expansion and interior refinements:
🏠 New Exterior Door Preparation:
We built a solid wall frame to accommodate a second exterior entrance, allowing for better access and flow through the space.
🔦 Electrical Re-routing:
As part of the wall expansion, we relocated and updated electrical lines to fit the new configuration. All wiring was safely housed and prepared for final fixtures.
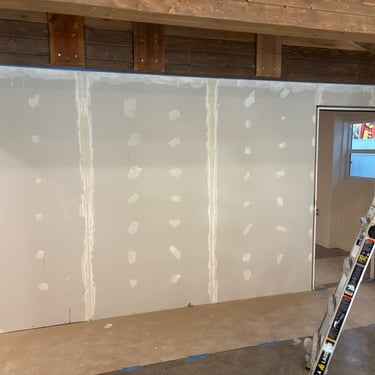
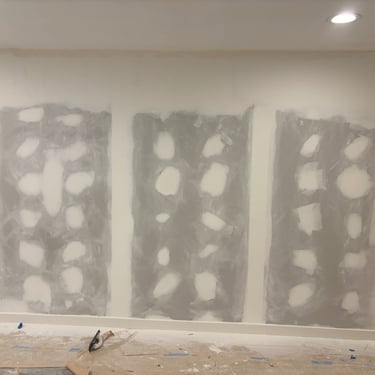
🖊️ Drywall Installation & Finishing:
The newly framed areas were covered with drywall, carefully taped, mudded, and sanded to a smooth finish ready for paint.
🛋️ Molding and Trimwork:
To bring visual refinement, we installed clean, modern moldings along the updated wall surfaces. These finishing elements tied together the classic showroom style with a fresh, contemporary touch.
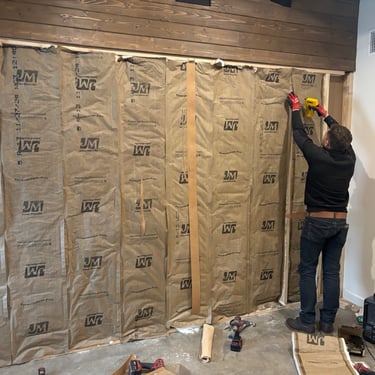
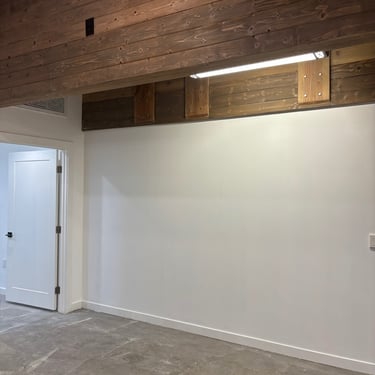
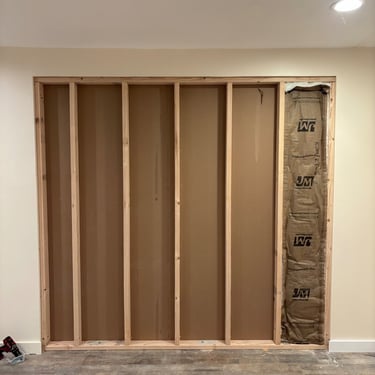
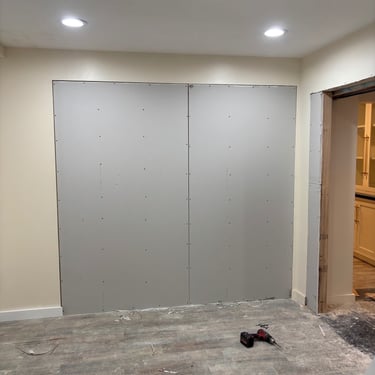
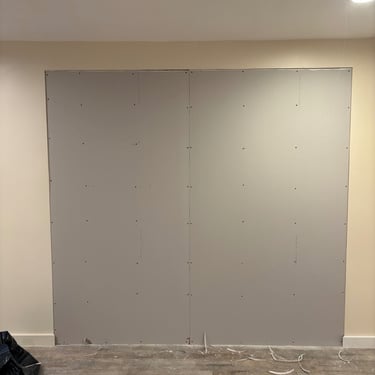
Phase 3: New Sound-Insulated Wall with Doorway
In this next part of the renovation, we focused on building a new interior wall with full sound insulation, which would not only define space more clearly but also improve acoustics and privacy between showroom zones.
📸 Photo Highlights:
The wall structure was first framed and securely anchored.
We used Johns Manville sound control insulation to fill the cavity — this step is essential in commercial settings where sound separation between client areas and back-of-house operations is important.
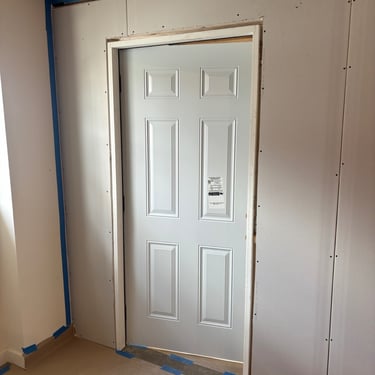
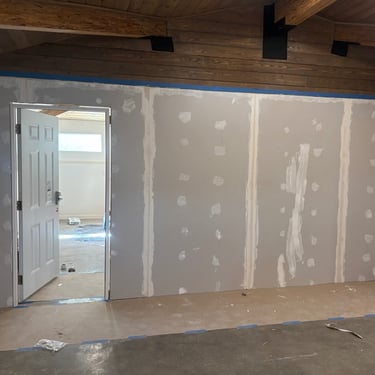
A new solid door was installed into the framed section, providing a private entrance between zones.
The entire surface was covered with drywall, carefully taped and mudded over multiple passes.
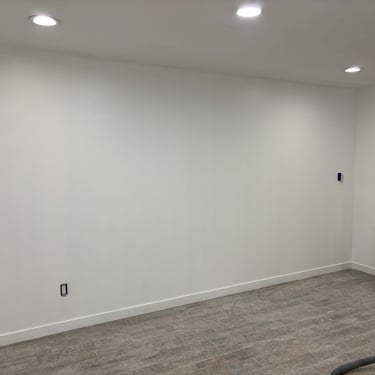
After sanding and detail prep, the wall was primed and painted to match the showroom palette.
Baseboards were installed at the base for a clean and uniform finish.
Ceiling beams and lighting fixtures were preserved and enhanced to maintain a cohesive look.
This new wall completely redefined the back section of the showroom — now both visually and acoustically separated — and created a more professional and purposeful interior layout.
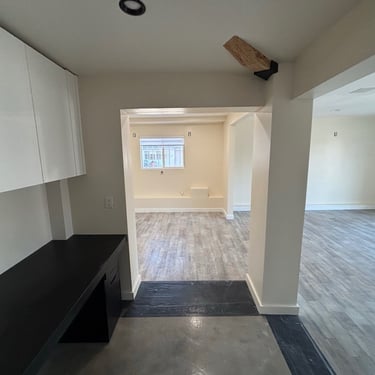
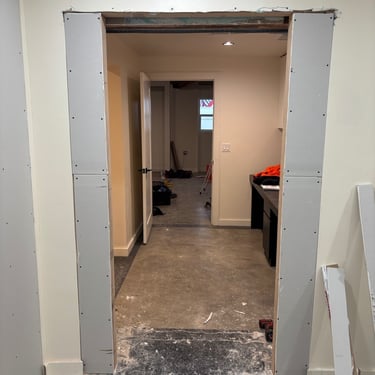
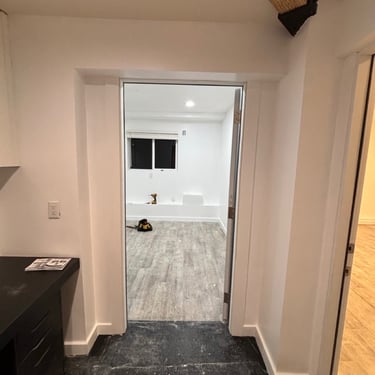
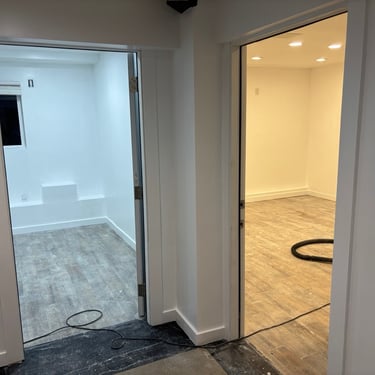
Phase 4: Connecting Zones and Expanding Accessibility
With major wall framing complete, the next stage of our renovation project focused on improving the flow between newly created spaces and existing areas of the showroom. This involved reworking doorways, finishing thresholds, and ensuring smooth transitions throughout the layout.
🔼 Creating Functional Passages
We widened and finished key openings to connect offices, display rooms, and back areas of the store. Every corner was squared, trimmed, and prepped for finishing coats of paint to blend into the modern minimalist interior.
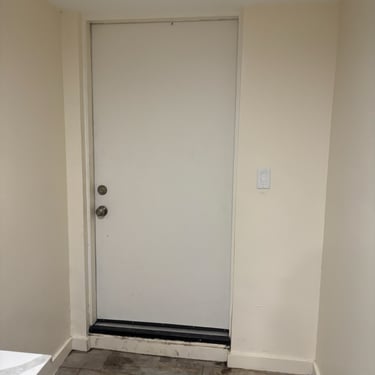
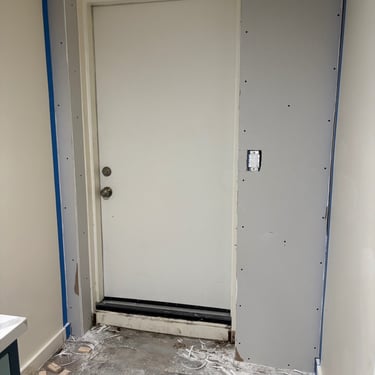
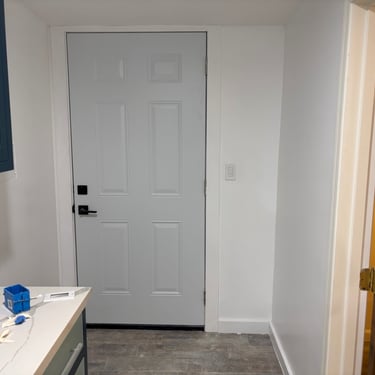
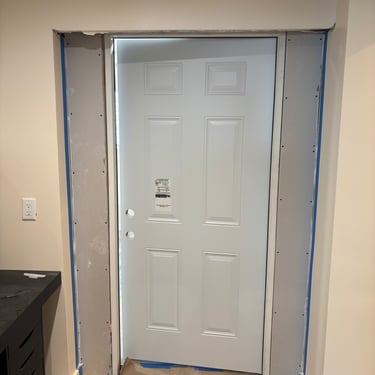
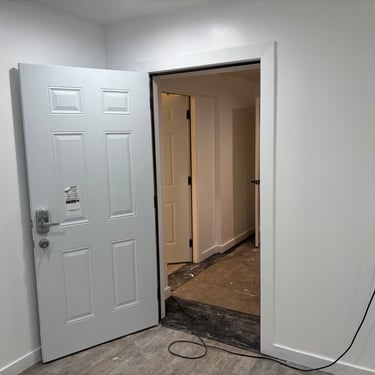
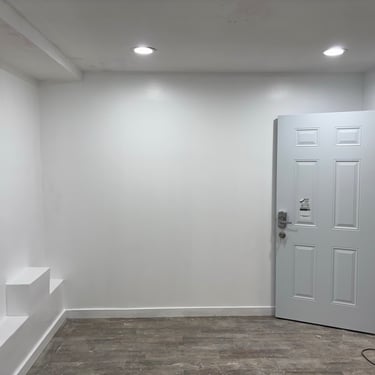
🚪 New Exterior Access
A new insulated exterior door was installed with a clean drywall return and frame. We ensured precise alignment and added a lockable handle set for security.
🌟 Clean Paint Finish and Trim
All drywall seams and added structures were mudded, sanded, and repainted. Baseboards and trims were installed throughout, framing each doorway and room opening neatly.
This phase not only enhanced the professional presentation of the showroom but also improved the functional movement between workspaces and display zones, helping prepare the space for the final installation of kitchen displays.
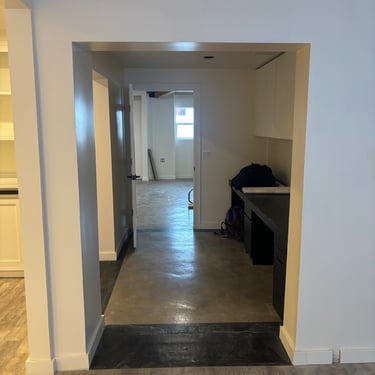
Step 5 – Continued Renovation Progress
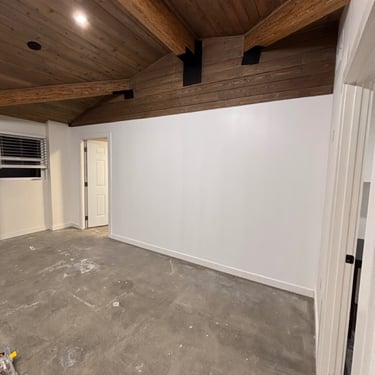
As our renovation project in the Los Angeles kitchen furniture store continued, the focus shifted to the back area where additional structural and cosmetic improvements were required.
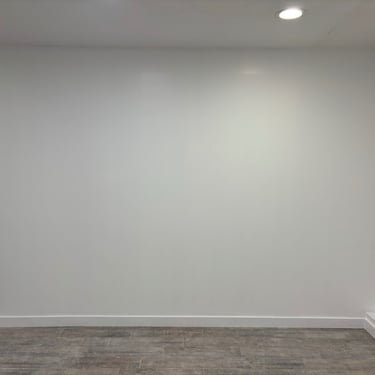
In this phase, we built another interior wall, fully insulated to help control sound and temperature between the rooms. The framing was carefully aligned and anchored to the existing floor and ceiling. We then installed drywall, followed by taping, mudding, and a complete smooth finish coat. Once everything dried, we primed and painted the wall to match the newly refreshed interior style of the store.
This space now forms a clean division between the main showroom and what will later become an auxiliary display or office room.
Notably, while we improved the structure and aesthetics of the walls, we kept the existing flooring untouched throughout the entire store to maintain continuity and minimize cost.
Stay tuned for the next phase as we continue transforming this space into a functional and stylish commercial environment.
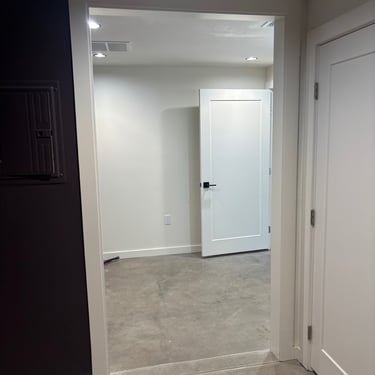
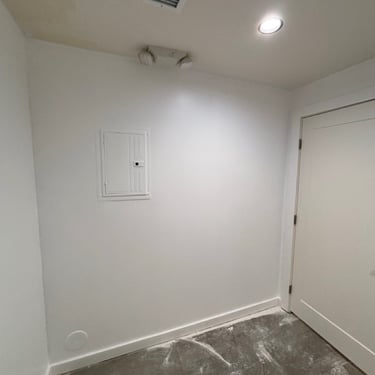
Step 6 – Bathroom Wall Closure and Redesign
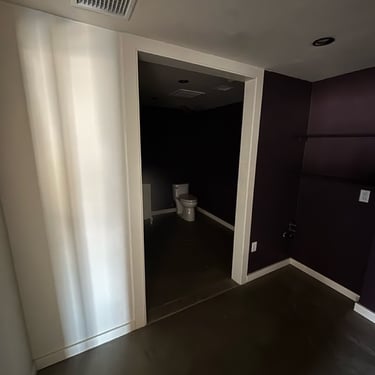
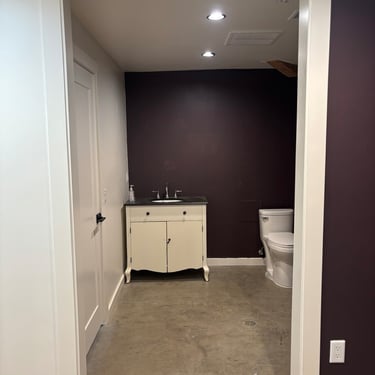
In the final stage of our renovation project for the kitchen furniture showroom in Los Angeles, we focused on modifying and enhancing the small bathroom area and its adjoining entry.
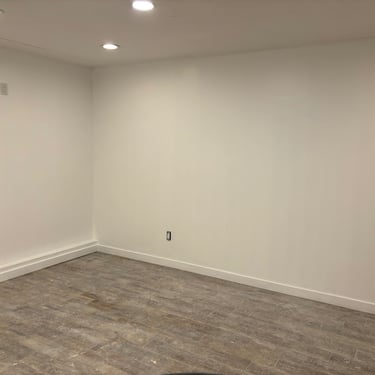
We began by closing off one of the existing doorways to optimize the use of space and create a more streamlined traffic flow between rooms. This required careful removal of trim, securing structural integrity, and installing new drywall to fully enclose the old passage.
At the same time, we patched the wall openings, aligned the textures with the existing surfaces, and repainted the entire area for a clean and cohesive look. The lighting in this corner was updated with new recessed fixtures, and the adjacent utility access panel was seamlessly integrated into the finished wall.
A fresh coat of white paint was applied across the repaired surfaces to visually unify the bathroom entrance and the new wall. While no flooring was altered in this step, the surrounding concrete was cleaned and detailed to reflect the overall renewed appearance of the space.
This step marked the final transition in our multi-phase remodeling effort, leaving the showroom ready for fixtures and final decoration.
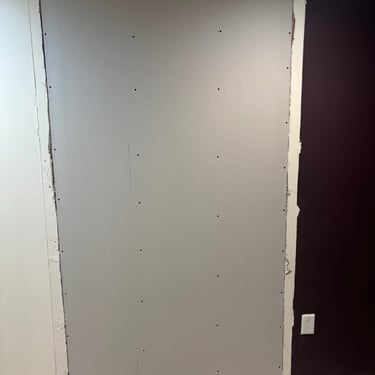
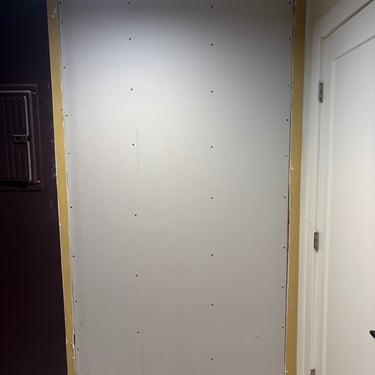
Step 7: Closing Off the Exterior Wall
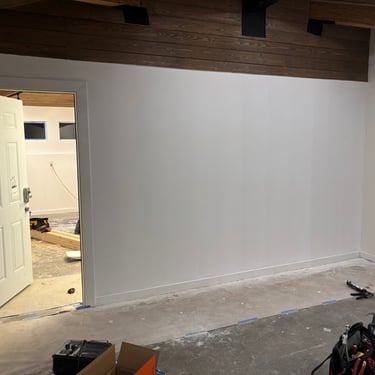
In this phase of the remodeling project, we addressed a major structural change: closing off one of the building's exterior walls to optimize the interior layout and improve insulation.
First, we constructed a new internal wall framework with vertical studs positioned to support both drywall and future electrical components. We included insulation in the newly framed section to provide thermal and acoustic protection, maintaining comfort and privacy in the adjacent rooms.
Once the framing was complete and electrical planning finalized, we installed drywall over the newly framed section. Every joint and screw head was carefully taped and mudded, ensuring a seamless finish with the surrounding wall surfaces. After allowing sufficient drying time, the patched area was sanded and smoothed.
We then primed and painted the wall to match the room's existing color palette. The final result is a clean, uniform wall surface that appears original to the structure. The space is now better suited for functional cabinetry or display furniture along the newly finished wall.
This transformation demonstrates our ability to reconfigure spaces for practicality while maintaining high visual standards.
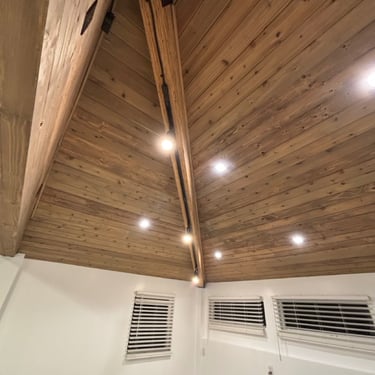
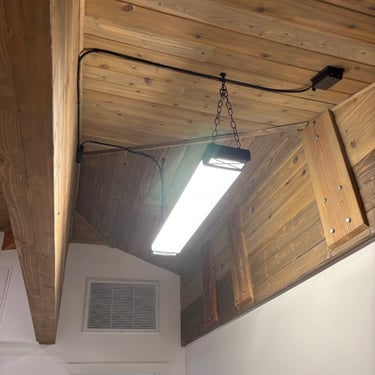
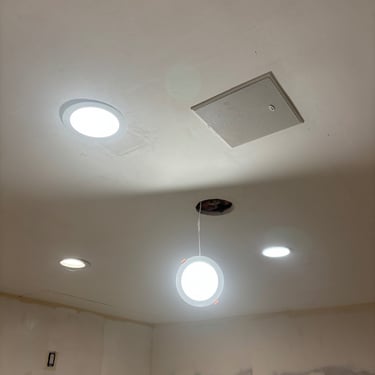
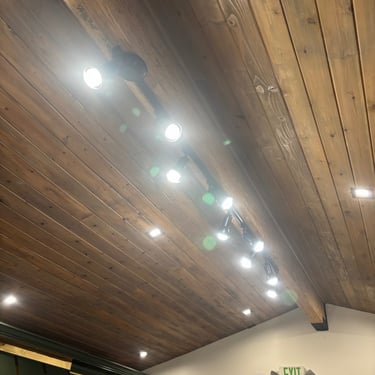
Step 8: Installation of New Lighting
To enhance the functionality and ambiance of the newly remodeled kitchen furniture store, we completed a comprehensive lighting upgrade throughout the space.
In the main showroom and working areas, we installed recessed LED lights in the ceiling to ensure even, bright illumination. These fixtures not only improve visibility for both employees and customers but also add a modern, polished look to the environment. Several areas received additional accent lighting using pendant fixtures and surface-mounted spotlights. These were strategically placed to highlight cabinetry displays and workspaces.
Special attention was given to areas with wood-paneled ceilings, where we installed directional spotlights mounted on black metal tracks. This solution maintained the aesthetic integrity of the natural wood while offering flexibility in lighting direction for future adjustments in product placement.
We also updated lighting in the hallways and newly partitioned rooms, adding clean, recessed LED fixtures that match the rest of the renovation. All lighting installations were wired and tested to ensure full functionality and code compliance.
Overall, the new lighting brings warmth, clarity, and a touch of sophistication, completing the transformation of the interior and making it more inviting and efficient for daily business operations.
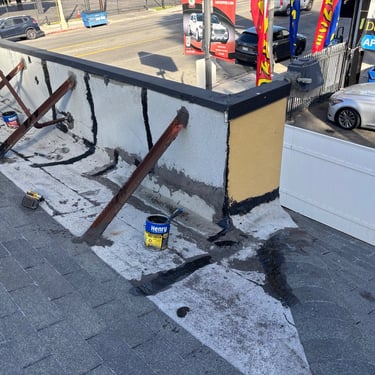
Step 9: Roof Repair — Eliminating Leaks
In addition to the extensive interior renovation, we addressed a serious leak issue on the rooftop. The leaking section was located where the flat roof met the vertical parapet wall. Water had been seeping through gaps around old support brackets and improperly sealed flashing areas, compromising both the interior and exterior structure.
To resolve this issue, we began by thoroughly cleaning the damaged roofing area. All debris, loose roofing material, and deteriorated sealant were removed. We then applied Henry roofing cement and sealant to all seams, joints, and around the metal brackets securing the parapet. Additional layers were carefully built up in critical weak points where water had been collecting.
The entire section was reinforced with new sealant and layered over with waterproofing membrane. The final stage included a protective asphalt top coat, providing a water-tight seal and improved UV resistance.
This intervention not only prevented further water intrusion but also added years of life to the existing roof structure, ensuring a dry and secure environment inside the newly renovated space.