How We Installed a Roof-Mounted Turbine Vent on a Glendale Garage
Poor ventilation in a garage can lead to heat buildup, trapped moisture, and lingering odors. Unlike living spaces, garages often lack natural airflow, especially when they are enclosed or attached to the house. In this project, ProHands Handyman installed a roof-mounted turbine vent on a garage in Glendale, improving air circulation without relying on electrical systems.
ALUMINUMROOFOUR WORKSOUTDOOR WORK
7/18/20252 min read
This solution provides continuous passive ventilation driven by wind and temperature differences.
⸻
The Problem: Heat and Poor Airflow in the Garage
Before installation, the garage experienced:
• excessive heat buildup during warm days
• stagnant air with limited circulation
• moisture lingering after weather changes
• reduced comfort and usability of the space
Opening doors or windows provided only temporary relief and was not a practical long-term solution.
⸻
Why a Turbine Vent Is a Good Fit for a Garage
A roof-mounted turbine vent works differently from powered fans. It:
• uses wind and thermal pressure to extract hot air
• operates continuously without electricity
• increases airflow even when the garage is closed
• requires minimal maintenance
For garages, this makes turbine vents a simple and reliable ventilation option.
⸻
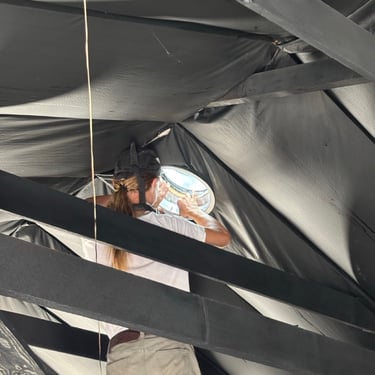
Planning the Installation
Before cutting into the roof, the installation was carefully planned:
• the vent location was selected for optimal airflow
• roof slope and panel layout were evaluated
• clearance inside the garage was checked
Proper placement ensures the turbine vent performs effectively and avoids interference with roof structure.
⸻
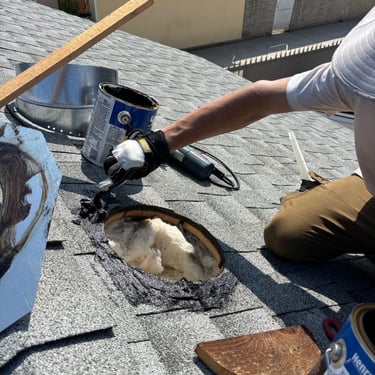
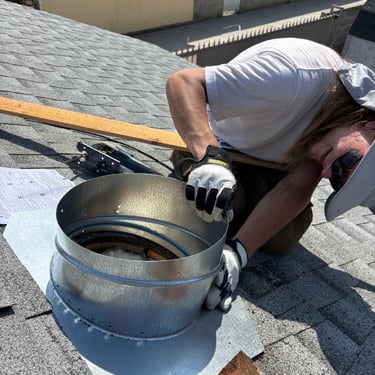
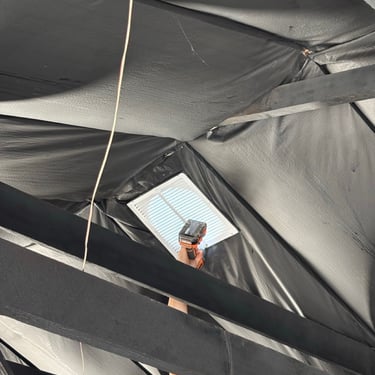
Cutting and Preparing the Roof Opening
The installation process began with preparing the roof surface:
• the roof opening was measured and cut precisely
• surrounding roofing material was adjusted cleanly
• the opening was prepared to accept the vent base
Accuracy at this stage is critical to prevent leaks and ensure a proper fit.
⸻
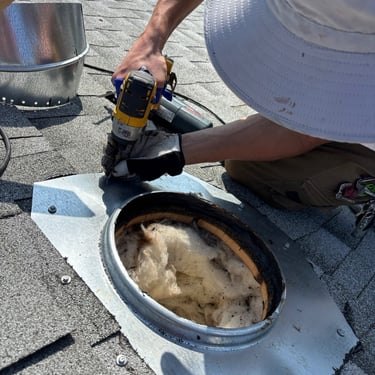
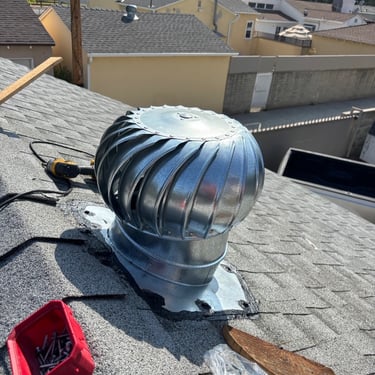
Installing the Turbine Vent
Once the opening was prepared:
• the turbine vent was mounted securely
• flashing was integrated with the existing roofing
• all connection points were sealed properly
The vent was aligned to rotate freely and extract air efficiently.
⸻
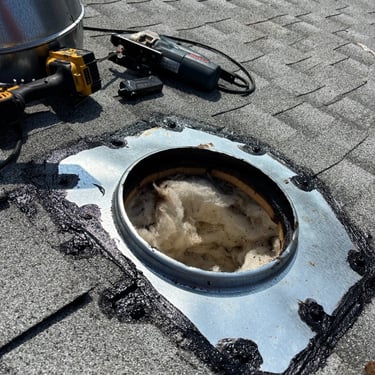
Weatherproofing and Sealing
Special attention was given to weather protection:
• flashing was installed to direct water away from the opening
• sealants were applied to prevent moisture intrusion
• the roof surface was restored around the vent
Proper weatherproofing ensures the vent does not become a future leak point.
⸻
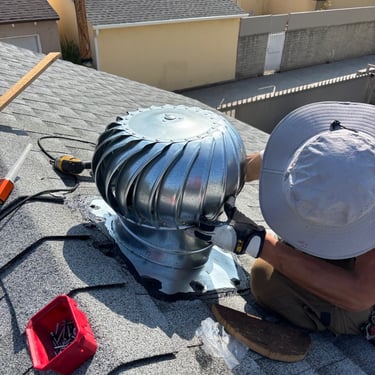
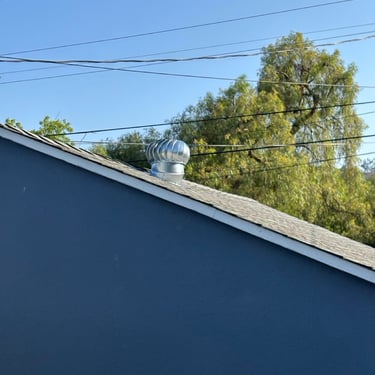
Result: Improved Airflow Without Electricity
After installation:
• hot air was continuously expelled from the garage
• interior temperature became more stable
• air quality improved without noise or power usage
The turbine vent provided a passive, always-on ventilation solution.
⸻
Why Professional Installation Matters
Installing a roof-mounted vent involves more than cutting a hole. Without proper flashing and sealing:
• roof leaks can develop
• vent performance can be reduced
• roofing materials can be damaged
Professional installation ensures the vent works as intended and the roof remains watertight.
⸻
Why Homeowners in Glendale Choose ProHands Handyman
Homeowners in Glendale choose ProHands Handyman for garage ventilation projects because we focus on:
• correct vent placement
• clean roof integration
• durable weatherproofing
• practical, long-term solutions
We treat roof penetrations as critical structural details, not minor add-ons.
⸻
Conclusion
This garage turbine vent installation shows how a simple, non-powered solution can dramatically improve airflow and comfort. By installing a roof-mounted turbine vent correctly and sealing it properly, the garage gained continuous ventilation without compromising the roof.
⸻
Need Better Garage Ventilation in Glendale?
ProHands Handyman
📞 818-401-7766
Contact us to discuss turbine vents or other practical ventilation solutions for your garage.