Door Jamb Repair: Step-by-Step Restoration
Door jambs take constant stress from daily use, moisture exposure, and structural movement. Over time, this can lead to cracks, looseness, rot, or misalignment around the door opening. In this project, ProHands Handyman performed a step-by-step door jamb restoration, repairing damaged sections and restoring proper function without replacing the entire door unit.
RESTORATIONWOODDOORSINTERNAL REPAIRSOUR WORKS
8/17/20252 min read
This approach allows the door to remain in place while correcting the underlying issues.
⸻
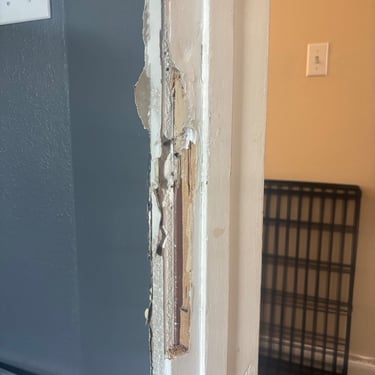
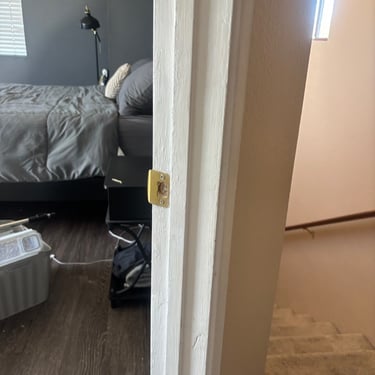
Initial Condition of the Door Jamb
Before repair, the door jamb showed clear signs of damage:
• cracked or split wood near the latch area
• softened or deteriorated sections at the base
• loose trim and misaligned edges
• reduced stability when opening and closing the door
Although the door itself was still usable, the damaged jamb affected both function and appearance.
⸻
Why Door Jamb Restoration Is Often Better Than Replacement
Replacing a full door unit involves removing trim, disturbing surrounding walls, and increasing labor and material costs. Door jamb repair allows homeowners to:
• fix the problem at its source
• preserve the existing door and hardware
• avoid unnecessary demolition
• restore strength and alignment efficiently
When the damage is localized, restoration is the most practical solution.
⸻
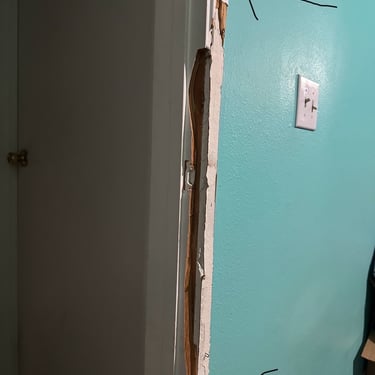
Step 1: Removing Damaged Wood
The repair began with careful removal of compromised material:
• cracked or rotted sections were cut out
• loose fibers were cleaned away
• the remaining jamb was inspected for hidden damage
Only the affected areas were removed, preserving as much original material as possible.
⸻
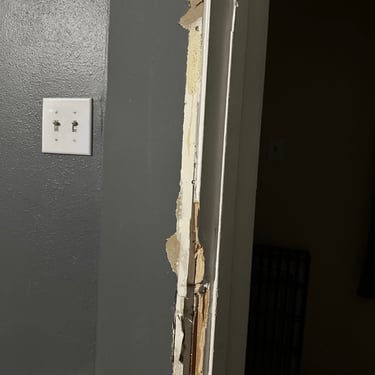
Step 2: Structural Rebuilding and Reinforcement
Once the damaged wood was removed:
• new wood was shaped to match the jamb profile
• the repair area was reinforced and secured
• alignment was corrected to restore door operation
This step restored the structural integrity of the door opening.
⸻
Step 3: Filling, Shaping, and Surface Repair
After structural repairs:
• filler and repair compounds were applied
• surfaces were shaped and leveled
• edges were refined to match the original jamb
Attention to detail here ensures the repair blends seamlessly once finished.
⸻
Step 4: Sanding and Surface Preparation
The repaired area was then:
• sanded smooth
• blended into surrounding surfaces
• prepared for finishing
Proper preparation prevents visible transitions and uneven paint.
⸻
Step 5: Priming and Painting
To complete the restoration:
• primer sealed the repaired wood
• paint was matched to the existing finish
• coats were applied evenly for durability
The finished jamb looked consistent with the rest of the door frame.
⸻
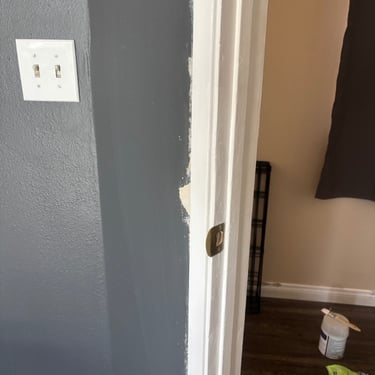
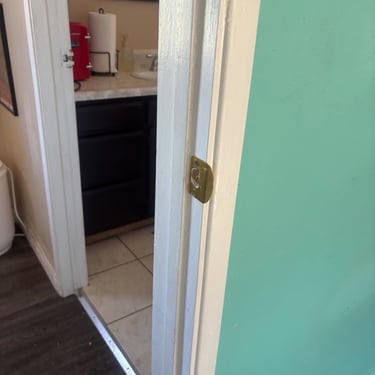
Result: Restored Strength and Clean Appearance
After completion:
• the door operated smoothly
• the jamb was structurally solid
• repaired areas were visually invisible
• the door frame regained its original appearance
The repair extended the life of the door without replacement.
⸻
Why Professional Door Jamb Repair Matters
Door jamb repairs require precision. Without proper alignment and reinforcement:
• doors may stick or sag
• cracks can reappear
• hardware may loosen over time
Professional restoration ensures long-term performance and clean results.
⸻
Why Homeowners Choose ProHands Handyman
Homeowners choose ProHands Handyman for door jamb repairs because we focus on:
• accurate damage assessment
• targeted restoration instead of overbuilding
• clean craftsmanship
• durable finishes
We treat door jambs as structural components, not just trim.
⸻
Conclusion
This step-by-step door jamb restoration shows how damaged door frames can be repaired effectively without full replacement. By removing compromised material, rebuilding the structure, and carefully finishing the surface, the door jamb was restored to full strength and appearance.
⸻
Need Door Jamb Repair Instead of Full Door Replacement?
ProHands Handyman
📞 818-401-7766
Contact us to discuss professional door jamb repair and restoration.