Bathroom Renovation: Tile Installation and Bathtub Cladding
A bathroom renovation does not always require a full demolition to make a noticeable difference. In this project, ProHands Handyman completed a bathroom upgrade focused on professional tile installation and bathtub cladding, significantly improving both appearance and functionality while keeping the existing layout intact.
TILEINTERNAL REPAIRSOUR WORKS
5/10/20252 min read
This approach allowed the homeowner to refresh the space efficiently and achieve a clean, modern result.
⸻
Initial Condition of the Bathroom
Before renovation, the bathroom showed common issues:
• outdated wall finishes around the bathtub
• worn or visually inconsistent tile surfaces
• an overall tired appearance despite functional plumbing
The bathtub itself was still in usable condition, making it a good candidate for cladding rather than replacement.
⸻
Project Scope and Planning
The scope of work was carefully defined to focus on the most impactful upgrades:
• preparation of wall surfaces
• tile installation in key wet areas
• bathtub cladding for a unified finish
• careful alignment and finishing details
By limiting the work to these elements, the renovation remained efficient while delivering a visible transformation.
⸻
Surface Preparation
Proper preparation is essential in any bathroom tile project. This stage included:
• cleaning and leveling wall surfaces
• ensuring proper adhesion areas for tile
• addressing minor imperfections before installation
Skipping preparation often leads to tile failure, uneven lines, or water intrusion over time.
⸻
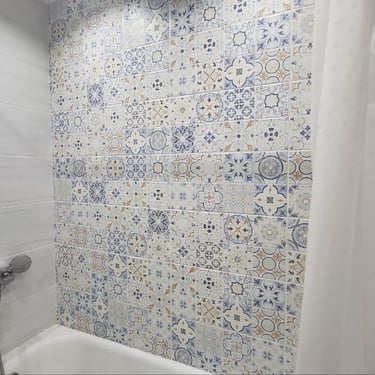
Tile Installation
The tile installation process focused on precision and durability:
• tiles were laid with consistent spacing
• cuts were carefully made around fixtures and edges
• alignment was checked continuously to maintain clean lines
Correct tile installation not only improves appearance but also protects walls from moisture.
⸻
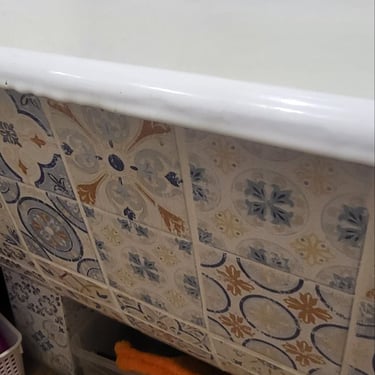
Bathtub Cladding
Instead of removing the bathtub, cladding was installed to:
• refresh the visual look of the tub area
• create a seamless transition between tile and tub
• improve water resistance and ease of maintenance
This solution preserved the existing tub while achieving a modern, cohesive finish.
⸻
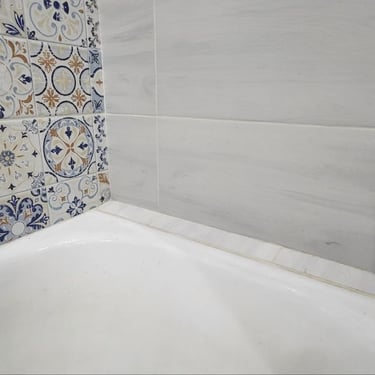
Grouting, Sealing, and Finishing
Once tiles were installed:
• grout was applied evenly and cleaned carefully
• all joints were sealed to prevent moisture penetration
• edges and transitions were finished for a clean look
These final steps are critical for long-term durability in a wet environment.
⸻
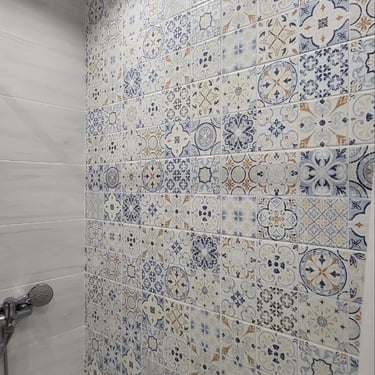
Result: A Clean and Updated Bathroom
After completion, the bathroom felt:
• brighter and more cohesive
• visually modern without altering the layout
• easier to maintain due to updated surfaces
The renovation delivered a noticeable improvement without unnecessary demolition.
⸻
Why Professional Tile and Bathroom Work Matters
Bathroom tile installation and bathtub cladding require experience. Incorrect slopes, poor sealing, or uneven tile placement can lead to water damage behind walls.
Professional work ensures:
• proper water protection
• clean, straight lines
• durable finishes that last
This project demonstrates how targeted upgrades can make a bathroom feel new again.
⸻
Why Homeowners Choose ProHands Handyman
Homeowners in Los Angeles and nearby areas choose ProHands Handyman because we focus on:
• careful planning
• precise tile installation
• clean workmanship
• long-lasting, practical results
Each bathroom project is handled with attention to detail and respect for the existing space.
⸻
Conclusion
This bathroom renovation shows that tile installation and bathtub cladding can dramatically improve the look and function of a bathroom without a full remodel. With proper preparation and professional execution, even focused upgrades can deliver lasting value.
⸻
Planning a Bathroom Upgrade?
ProHands Handyman
Contact us to discuss your bathroom renovation project and receive professional guidance.