Assembling a Dresser: Practical Tips From Real-World Experience
At first glance, assembling a dresser looks simple. A box arrives, parts are labeled, instructions are included — what could go wrong? In reality, dresser assembly is one of those tasks that seems easy until you’re halfway through, surrounded by panels, screws, and parts that suddenly don’t line up the way the diagram promised.
FURNITUREOUR WORKS
8/23/20252 min read
This project is a good example of why proper assembly matters and what actually goes into doing it right.
⸻
Why Dressers Are More Complicated Than They Look
Dressers combine several problem areas in one piece of furniture:
• large vertical panels that must stay square
• multiple drawers that depend on precise alignment
• thin backing panels that affect overall rigidity
• hardware that allows little margin for error
If one step is rushed or done out of order, the entire unit can end up unstable, misaligned, or permanently damaged.
⸻
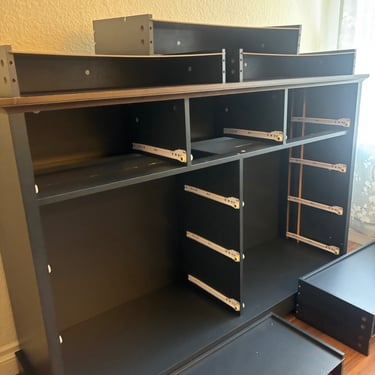
What We Saw at the Start
The dresser arrived in multiple boxes with:
• flat panels
• drawer components
• slides, fasteners, and hardware
• manufacturer instructions with minimal tolerance for mistakes
Nothing was broken, but that doesn’t mean the process was forgiving. With furniture like this, the quality of the final result depends almost entirely on the assembly sequence and attention to detail.
⸻
The Most Common Assembly Mistakes We See
From experience, dresser assembly often goes wrong when:
• screws are overtightened early
• panels are forced into place
• drawer slides are installed slightly off-level
• backing panels are treated as “optional”
These mistakes usually don’t show up immediately — they appear later as sticking drawers, wobbling frames, or visible gaps.
⸻
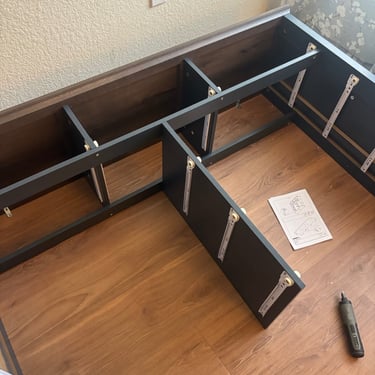
Step-by-Step Assembly Approach
Instead of rushing through the instructions, the assembly was done methodically:
• panels were aligned dry before tightening
• fasteners were secured gradually, not all at once
• drawer slides were checked for level and symmetry
• drawers were assembled and tested individually
This approach keeps the structure square and prevents cumulative alignment errors.
⸻
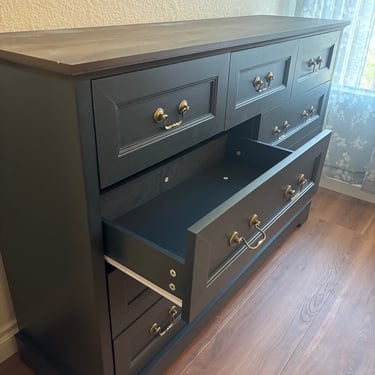
Drawer Alignment Makes or Breaks the Result
Drawers are where most DIY assemblies fail. Even a small misalignment:
• causes drawers to bind
• creates uneven gaps
• wears out slides prematurely
Each drawer was adjusted so it opened smoothly, closed flush, and sat evenly within the frame.
⸻
Final Stability Check
Once fully assembled, the dresser was:
• checked for wobble
• tightened selectively where needed
• inspected for structural rigidity
A properly assembled dresser should feel solid, not flexible or shaky.
⸻
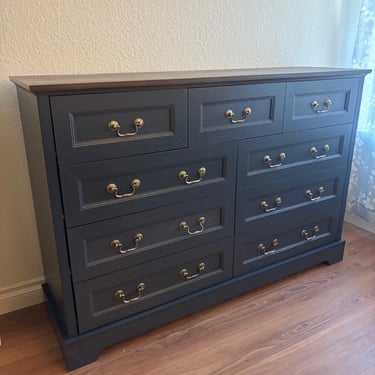
The Result: A Functional, Solid Piece of Furniture
After completion:
• drawers opened smoothly
• the frame remained square
• the dresser felt stable and well-built
• no visible gaps or misalignment remained
The difference between rushed assembly and careful assembly is noticeable immediately — and even more so over time.
⸻
Why Professional Furniture Assembly Is Often Worth It
Furniture like dressers is designed to be assembled, but not necessarily to be assembled quickly or carelessly. Professional assembly:
• prevents hidden structural issues
• avoids stripped hardware
• extends the life of the furniture
• saves time and frustration
Especially with large or drawer-heavy pieces, experience matters.
⸻
Why Homeowners Choose ProHands Handyman
Homeowners choose ProHands Handyman for furniture assembly because we focus on:
• correct assembly sequence
• precise alignment
• long-term stability
• clean, finished results
We don’t treat furniture as disposable — we assemble it to last.
⸻
Conclusion
This dresser assembly project shows that “simple” furniture can still require skill and patience. With the right approach, the result is a solid, functional piece that performs the way it should — without future issues.
⸻
Need Help Assembling Furniture Without the Headache?
ProHands Handyman
📞 818-401-7766
Reach out if you want your furniture assembled correctly the first time.